

Wood Care for Furniture Flippers: A 2026 Guide
Table of Contents
- What Furniture Flippers Need to Know About Wood Care
- Clean First: Removing Dirt, Grime, and Residue
- Identify the Wood and Finish Before You Touch It
- Damage Triage: What to Repair, What to Leave Alone
- Surface Preparation: Scuff Sanding and Stripping
- How to Revive Dry Wood Furniture Without Refinishing
- The Best Wood Conditioner for Furniture Flipping
- Applying Beeswax and Oil to Wood: Step by Step
- Frequently Asked Questions
Last Updated: October 9, 2026
What Furniture Flippers Need to Know About Wood Care
Wood care for furniture flippers starts with one rule: assess the piece before deciding how much work it actually needs. Many flips do not require a full refinish. A careful inspection, gentle cleaning, and the right conditioning or finishing approach may be enough to improve the piece while preserving what is already working.
This guide from Arlington Woodworks walks through the sequence from identifying the wood and existing finish to cleaning, repairing, preparing, and conditioning the surface.
One of the easiest ways to create unnecessary work is to reach for sandpaper too early. If an existing finish is stable and worth preserving, aggressive sanding or stripping can remove character, damage veneer, or create a much larger refinishing project than the piece needed.
The risks are especially important with veneer, older finishes, and antique furniture. Thin veneer can be sanded through, incompatible products can leave an uneven surface, and stripping a desirable aged finish can remove some of the character that made the piece appealing in the first place.
Clean First: Removing Dirt, Grime, and Residue
Cleaning is the first step because dirt and residue can hide the true condition of the surface underneath. A piece that looks dull or lifeless may simply be dirty, and a careful cleaning can sometimes reveal a finish worth preserving rather than replacing.
Start with the least aggressive method that gets the job done. A soft cloth that is only slightly damp can remove loose dust and light surface grime. For heavier everyday residue, a small amount of mild dishwashing liquid diluted in water may help, but always test the method in a hidden area first.
Work in small sections and avoid soaking the surface. Wipe with the grain when possible, then dry the area promptly with a second soft cloth.
For carved details and corners, a soft-bristled brush can help loosen dirt without aggressive scrubbing. If the residue does not lift easily, stop and reassess before moving to a stronger cleaner or more abrasive method.
Gentle Methods That Won't Damage the Original Finish
Unknown finishes deserve a cautious approach. The goal is to remove dirt while disturbing the existing finish as little as possible.
Avoid these common mistakes:
- Soaking the surface or leaving standing water
- Using abrasive pads or scrub sponges on finished wood
- Applying strong household cleaners or solvents without testing first
- Using a dripping cloth near veneer seams or damaged edges
Test any cleaning solution on an inconspicuous area before treating the whole piece. If the finish clouds, softens, lifts, or changes unexpectedly, stop and reassess before continuing.
Identify the Wood and Finish Before You Touch It
Identification determines what options are available next. The same piece can require very different treatment depending on whether it is solid wood or veneer and whether the existing finish is penetrating or film-forming.
Solid wood is wood throughout the structural section of the piece. It generally gives you more flexibility for sanding, repair, and refinishing because there is more material to work with.
Veneer is a thin layer of real wood applied over a substrate. Because that visible wood layer can be very thin, aggressive sanding can cut through it quickly and permanently damage the surface.
Check edges, corners, drawer interiors, and the underside of the piece. Changes in grain direction, visible seams, or a different material beneath the surface can indicate veneer.
Solid Wood vs. Veneer: What Changes in Your Plan
Solid wood usually gives you a wider range of repair and refinishing options. Veneer calls for more restraint.
Feature |
Solid Wood |
Veneer |
|---|---|---|
Sanding tolerance |
Generally more forgiving |
Limited; use a lite touch |
Stripping |
Possible with appropriate care |
Possible, but test first and protect seams/adhesives |
Repair options |
Fill, reshape, sand, refinish |
Patch, stabilize, or replace damaged sections |
Best approach |
Repair or refinish as needed |
Preserve as much original surface as possible |
For veneered pieces, avoid aggressive power sanding unless you are certain there is enough material to work with. Hand sanding, careful cleaning, or another less invasive method may be the better choice.
Oil-Finished vs. Film-Sealed Surfaces
An oil-finished surface has finish that penetrates into the wood rather than forming a heavy coating on top. It often retains a more natural wood feel and may respond well to compatible conditioning products.
A film-sealed surface has a coating on top of the wood, such as lacquer, polyurethane, or varnish. These finishes tend to feel smoother and absorb less product.
If you are unsure what finish is already on the piece, do not rely on a single quick test. Start with visual inspection, test any cleaner or care product in a hidden area, and observe how the surface responds before treating the entire piece.
Damage Triage: What to Repair, What to Leave Alone
Not every flaw needs to be fixed. Furniture flippers can lose time and margin by treating every scratch, dent, or worn edge as a problem that requires repair.
A practical way to assess a piece is to sort what you see into three categories: structural damage, cosmetic wear, and character or patina.
Structural damage includes loose joints, broken legs, unstable frames, warped components, and lifting veneer. These problems affect the function or durability of the piece and should be addressed before cosmetic work.
Cosmetic wear includes light scratches, small dents, dullness, and surface discoloration. Some of these issues are worth improving, while others may be minor enough to leave alone.
Character and patina are the signs of age and use that can add visual interest to older furniture. On vintage, mid-century, or antique pieces, removing every sign of wear can sometimes make the piece less appealing rather than more valuable.
Surface Preparation: Scuff Sanding and Stripping
Surface preparation comes after cleaning and assessment. The goal is not to remove more finish than necessary, but to create a surface that is stable, compatible, and ready for whatever treatment comes next.
Two common approaches are scuff sanding and stripping, but neither should be automatic.
Scuff sanding uses a fine abrasive to lightly dull or key an existing finish before another compatible finish is applied. It is meant to improve adhesion, not remove the existing finish.
Stripping removes the old finish more completely and is appropriate when the finish is failing, badly damaged, or incompatible with the result you are trying to achieve.
When to Scuff Sand and When to Strip
Choose the least aggressive method that solves the actual problem.
- Scuff sand when the existing finish is sound and the next finish requires a lightly abraded surface for adhesion.
- Strip when the finish is peeling, cracked, badly deteriorated, or must be removed to reach the result you want.
- Do neither when the existing finish is stable, attractive, and can be preserved through cleaning and conditioning alone.
Compatibility matters. Before sanding or stripping, consider what finish is already present and what you plan to apply next.
For veneer, work especially carefully. Use light pressure, avoid unnecessary material removal, and favor hand sanding or other controlled methods when possible.
How to Revive Dry Wood Furniture Without Refinishing
Furniture that looks dull, faded, or dry does not always need to be stripped and refinished. If the existing finish is stable and compatible with conditioning, a careful cleaning followed by a small amount of wood conditioner may be enough to improve the appearance.
Signs that conditioning may be worth trying include:
- The surface looks dull, pale, or dry
- The finish is intact and not peeling or flaking
- Color loss is relatively even rather than concentrated in damaged areas
- The piece has been stored in a dry environment or has gone a long time without routine care
For compatible surfaces, a conditioning balm can help restore warmth, depth, and luster without removing the existing finish.
Start by cleaning the surface gently and allowing it to dry completely. Then test a small hidden area with the conditioner before treating the whole piece.
The Best Wood Conditioner for Furniture Flipping
The best wood conditioner for furniture flipping is one that improves the look and feel of dry or dull wood without creating unnecessary buildup or turning a simple refresh into a full refinishing project.
For flippers working through multiple pieces, the priorities are straightforward: transparent ingredients, easy application, predictable results, and a finish that enhances the wood without hiding its character.
Our pick is Artisan Furniture Wood Balm No. 524. It is made with three ingredients: certified-organic flaxseed oil, beeswax, and orange oil. No synthetic waxes and no mineral oil.
No. 524 is a wood conditioner and finishing balm, not a cleaner, sanitizer, stain remover, or repair product.

Artisan Furniture Wood Balm No. 524
What it does well:
- Helps restore warmth and depth to dry or dull wood
- Leaves behind a soft wax finish
- Works on food-contact surfaces such as cutting boards when used as directed
- Applies easily and buffs clean when excess product is removed
One important limitation: it will not repair a failing finish, fill scratches, remove stains, or fix structural damage. If the finish is peeling or the piece needs repair, address those issues first before conditioning the surface.
For flippers applying product by hand across larger surfaces, the Premium Artisan Palm Wax Brush can make application easier and more controlled than a cloth alone. The Starter Kit pairs the balm and brush together, while the Home Care Kit provides additional balm for multiple pieces or ongoing projects.


Applying Beeswax and Oil to Wood: Step by Step
Once the surface is clean, dry, and compatible with conditioning, applying a beeswax-and-oil balm is straightforward.
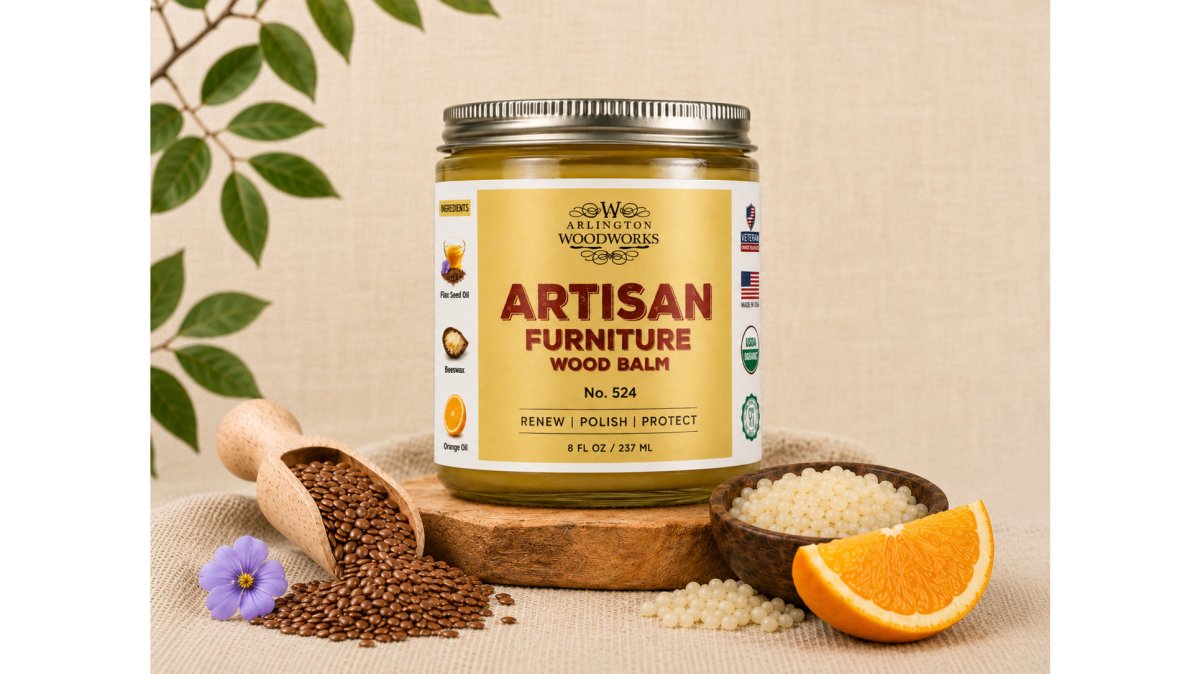
Artisan Furniture Wood Balm No. 524
What you'll need:
- Artisan Furniture Wood Balm No. 524
- A clean, soft cloth or the Premium Artisan Palm Wax Brush
- A clean buffing cloth
Step 1: Test a hidden area first.
Choose an inconspicuous spot and apply a small amount of product. Make sure you are satisfied with the color, sheen, and surface response before treating the entire piece.
Step 2: Start with a clean, completely dry surface.
Remove dust, dirt, and residue, then allow the piece to dry fully before applying balm.
Step 3: Apply a small amount.
Work a thin layer across the surface using a cloth or brush. A little goes a long way, so start light and add more only if needed.
Step 4: Follow the product directions.
Allow the balm to work into the surface according to the recommended application method rather than relying on a fixed dwell time.
Step 5: Buff away all excess.
Use a clean cloth to remove any product left on the surface and continue buffing until the finish feels smooth rather than greasy or tacky.
For food-contact pieces such as cutting boards and butcher blocks, use the product as directed and follow appropriate food-safety guidance for cleaning and care.
Flipping furniture profitably comes down to knowing when a piece needs repair, when it needs refinishing, and when careful cleaning and conditioning are enough. The goal is not to make every piece look new, but to improve it in a way that preserves character, protects your time, and supports the value of the finished piece.
Frequently Asked Questions
What is the difference between a wood cleaner and a wood conditioner?
A wood cleaner removes dirt, grime, and surface residue. A wood conditioner is used after cleaning to improve the look and feel of compatible wood surfaces. Artisan Furniture Wood Balm No. 524 is a conditioner and finishing balm made with certified-organic flaxseed oil, beeswax, and orange oil. It is not a cleaner, sanitizer, stain remover, or repair product.
Is it worth using organic wood balm on pine furniture?
Yes, when the surface is compatible with conditioning. Pine is a soft wood that can show wear, dents, and uneven absorption more readily than some harder woods, so test a hidden area first. A balm such as No. 524 can help restore warmth and luster to dry-looking pine while allowing the grain to remain visible. Apply lightly and buff away excess product rather than over-applying.
Can organic wood balm be used on kitchen surfaces like cutting boards?
Yes, when the product is made for food-contact wood and used as directed. Artisan Furniture Wood Balm No. 524 is made with food-safe ingredients and is appropriate for cutting boards, butcher blocks, wooden utensils, and kitchen wood when used as directed. Start with a clean, completely dry surface, apply a small amount, follow the product directions, and buff away all excess. Follow appropriate food-safety guidance for cleaning and sanitation.
How do you prepare a wood surface before applying a protective finish?
Preparation depends on the condition of the existing finish and what you plan to apply next. Start by cleaning the piece gently and allowing it to dry completely. If the existing finish is sound, the next product may require only light surface preparation or no sanding at all. If the finish is failing, damaged, or incompatible with the new finish, more extensive preparation may be necessary. Always consider finish compatibility, test unfamiliar products in a hidden area, and remove dust or residue before applying the next treatment.


