

Natural Wood Finish for Beginners: Step-by-Step Guide
Table of Contents
- What You'll Need Before You Start
- How to Prepare Wood for Finishing
- Oil vs Wax Wood Finish: Which One to Choose
- How to Finish Wood Naturally: Step-by-Step
- How to Apply Wood Wax for a Smooth, Even Coat
- Drying, Recoating, and Curing Timelines
- Troubleshooting Common Application Problems
- Conclusion: Your First Natural Wood Finish
- Frequently Asked Questions
Last Updated: October 17, 2026
What You'll Need Before You Start
A natural wood finish is often made with oils, waxes, or other naturally derived ingredients. Formulations vary, so the ingredient list and intended use matter more than the label alone. At Arlington Woodworks, we build ours around flaxseed oil and beeswax to condition wood and help restore warmth, depth, and a soft sheen.
Here is what we recommend gathering first:
- A wood conditioner or balm made with food-safe ingredients, such as Artisan Furniture Wood Balm No. 524, which is made with certified organic flaxseed oil, beeswax, and orange oil
- Lint-free cloths for applying and buffing
- A natural-bristle brush for larger flat surfaces, like the Premium Artisan Palm Wax Brush
- Sandpaper in a few grits, plus a sanding block
- Painter's tape for protecting hardware and edges
- A drop cloth and good ventilation
A natural wood finish is any finish that relies on plant- or wax-based ingredients rather than synthetic resins. At Arlington Woodworks, we build ours around flaxseed oil and beeswax because they nourish dry wood and leave a soft sheen.


How to Prepare Wood for Finishing
Surface preparation decides how even your finish looks. Skip it and no product will save you.
Work through the preparation that matches your project:
- Clean the surface. Remove dust, grease, and residue, then let the wood dry completely.
- For bare wood, sand if needed. Sand with the grain using progressively finer grits until the surface feels smooth.
- Remove sanding dust. Vacuum or wipe away all remaining dust before applying finish.
- For previously finished wood, inspect before sanding. Oil- or wax-finished surfaces may only need cleaning and conditioning, while film finishes such as polyurethane or varnish require compatibility with whatever you plan to apply next.
If you do not know what finish is already on the piece, test your chosen product in a hidden area before treating the entire surface.
Oil vs Wax Wood Finish: Which One to Choose
The short answer: oil is generally designed to penetrate the wood, while wax typically leaves more of its protective layer near the surface. Many natural finishes, including our balm, combine both for that reason. But the choice matters more than that one-liner suggests, because oil and wax fail in different ways and suit different projects.
Here is how the two compare:
Feature |
Oil Finish |
Wax Finish |
|---|---|---|
How it works |
Penetrates into the grain and polymerizes as it cures |
Sits on the surface as a thin sacrificial layer |
Look |
Warm, deeper color; amplifies figure and grain |
Soft, low sheen; slightly hazy on dark woods |
Protection |
Penetrates and conditions the wood; limited surface barrier |
Adds a renewable wear layer; easy to refresh |
Water resistance |
Low to moderate once cured |
Moderate; beads water briefly but wears through |
Best for |
Dry, thirsty wood; furniture; decorative pieces |
Everyday wear surfaces; touch-ups; low-traffic pieces |
Reapplication |
More often at first, then less as the wood saturates |
Light coats as needed; buffs back to life easily |
Common failure |
Uneven absorption and blotching on dense or figured wood |
Sticky buildup from excess product; fingerprints on soft wax |
Oil-based finishes like Danish oil, tung oil, and boiled linseed oil soak into the grain and, as they cure, harden slightly within the wood. That is why they bring out figure and depth without leaving a plastic film.
Wax finishes lay a thin layer on top of the wood. Wax is forgiving because it is renewable, you can buff a scuff back into the surrounding coat instead of sanding the whole surface. The trade-off is that wax offers modest water and wear resistance and can show fingerprints on soft formulations.
A blended product gives you both benefits in one step. That is the approach we take with No. 524, which pairs penetrating flaxseed oil with surface-protecting beeswax. The oil conditions dry wood and deepens the grain; the wax leaves a soft, renewable sheen on top.
How to Finish Wood Naturally: Step-by-Step
Finishing wood naturally means working in thin layers and letting each one settle. Here is the full process from start to cure.
Step 1: Sand and clean. Follow the prep steps above and make sure the surface is completely dry.
Step 2: Test a hidden area. Apply a small amount to an unseen spot and check the result after a few minutes.
Step 3: Apply a small amount. Scoop a little product onto a cloth or brush. A little goes a long way.
Step 4: Work it in. Use circular motions to spread the finish evenly across the grain, then finish with strokes along the grain.
Step 5: Follow the product directions. Allow the finish to penetrate or remain on the surface for the amount of time recommended for that specific product.
Step 6: Buff away all excess. Wipe off anything the wood hasn't absorbed with a clean, dry cloth. Leaving excess on the surface creates a sticky film.
Step 7: Let it dry and cure. Wait the full drying time before judging the result or adding another coat.
For food-contact pieces like cutting boards and butcher blocks, use a finish made with food-safe ingredients and follow the product's directions.
How to Apply Wood Wax for a Smooth, Even Coat
A smooth, even coat comes from thin layers, not heavy ones. Load your cloth or brush lightly and build up slowly.
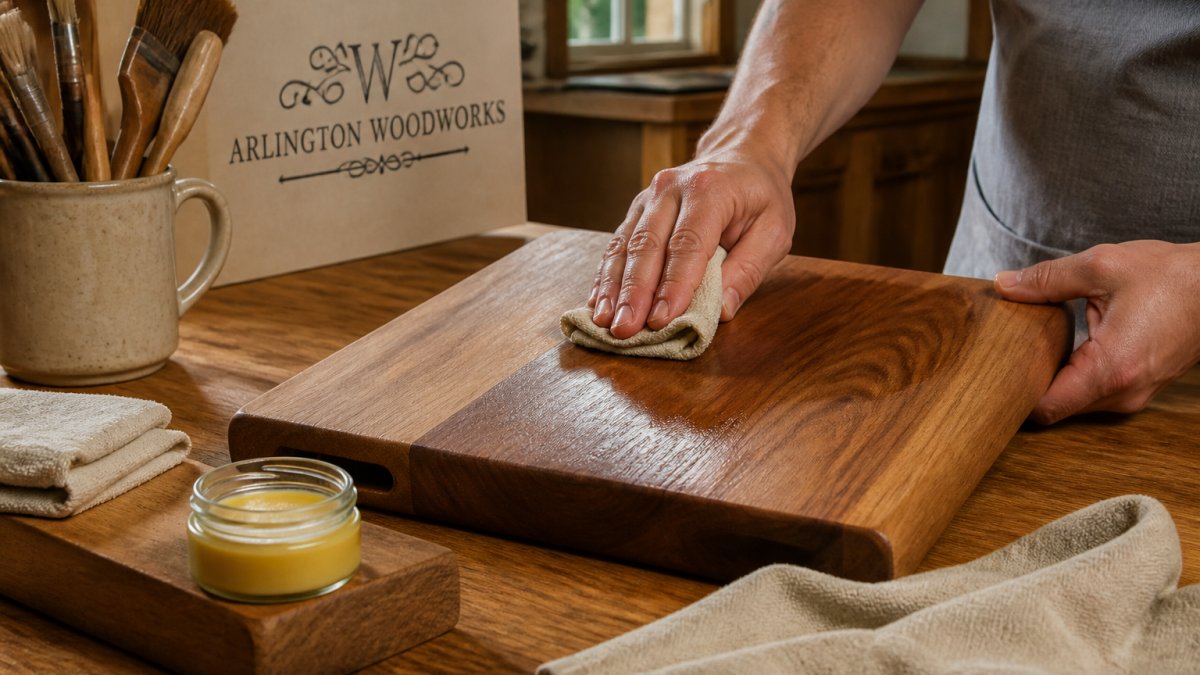
Close-up of hands applying wood balm to a wooden cutting board with a soft cloth, warm kitchen lighting, rich grain and natural sheen emerging
Follow these habits for a clean result:
- Use less than you think you need. Excess wax is the most common cause of a sticky finish.
- Work in sections. Finish one area before moving on so the coat stays even.
- Buff while it's still workable. Wipe off the excess before it sets.
- Go with the grain on your final pass. This leaves the smoothest look.
- Use a brush on flat surfaces. A palm brush gives you more control on tabletops and trim.
Arlington Woodworks offers a Starter Kit that pairs the balm with the palm wax brush, which makes even coverage easier on larger pieces.

Starter Kit
Drying, Recoating, and Curing Timelines
Drying and curing are two different things, and beginners often confuse them. Drying is when the surface feels dry to the touch. Curing is when the finish has fully settled into the wood and reached its final hardness and water resistance.
Here is a simple way to think about the timeline:
Stage |
What It Means |
What to Do |
|---|---|---|
Absorb |
Wood takes in the oil |
Wait a few minutes |
Buff |
Remove excess |
Wipe with a clean cloth |
Dry to touch |
Surface feels dry |
Check before recoating |
Recoat |
Add another thin layer if needed |
Apply lightly |
Full cure |
Finish has settled |
Wait before heavy use |
Why the timeline varies by finish type. Thin penetrating oils typically dry faster than film-forming finishes.
What shifts the timeline. Humidity and room temperature both affect how fast a finish sets. A warm, well-ventilated room speeds drying; a cool, damp room slows it and can leave a finish tacky far longer than the label suggests.
Recoating. Don't rush the recoat. Adding a second coat over a tacky surface traps solvent and creates streaks or a gummy layer. The test is simple: touch the surface in an inconspicuous spot. If it feels cool or tacky, or if your finger leaves a mark, it is not ready.
Curing before use. A freshly finished piece should not go into heavy use until it has had the full cure time on the label. Curing is when the finish reaches its final water resistance and hardness; handling it too soon can leave marks and uneven wear that no amount of buffing will fix.
Troubleshooting Common Application Problems
Most finish problems trace back to prep or excess product. Here are the fixes for the ones we hear about most.
Sticky or tacky surface. You left too much product on the wood. Wipe off the excess and buff again with a clean cloth.
Uneven color or blotchy patches. The finish may have absorbed unevenly or the surface may have had inconsistent preparation. Let the finish dry fully, then determine whether another light application, additional surface preparation, or another approach is appropriate for the specific finish.
Streaks or lap marks. You likely worked over a partly dried area. Apply in smaller sections and keep a wet edge.
Dull result after drying. The wood may have been thirsty and absorbed most of the coat. A second thin coat usually brings back the depth and luster.
Finish that wears off quickly. High-traffic surfaces need more frequent touch-ups. Light reapplication restores the protective layer.
A common mistake is reaching for a heavier coat to fix a problem. In practice, thinner is almost always better. Patience beats product volume every time.
If a piece has cracks, deep scratches, or a failing old finish, a conditioning balm won't repair that damage.
Conclusion: Your First Natural Wood Finish
Your first natural wood finish doesn't need to be complicated. Prep the wood, apply thin coats, buff off the excess, and give it time to cure.
The results are worth the patience. One customer put it simply: "I purchased this product and used it on our dining table. It was losing its finish and then I used the product. It looks almost new."
At Arlington Woodworks, we make small-batch wood care products built for exactly this kind of everyday project. Our balm is made with certified organic flaxseed oil, beeswax, and orange oil, and it's safe for food-contact surfaces when used as directed. It restores warmth and depth to dry, dull wood without heavy residue.
Ready to bring an old piece back to life? Shop All Products and start with a kit that matches your project.
Frequently Asked Questions
What is the most natural-looking finish for wood?
A penetrating oil or wax finish gives the most natural look because it soaks into the wood rather than forming a plastic-like film on top. It enhances the grain and color without a heavy gloss. Products like Artisan Furniture Wood Balm No. 524, made with organic flaxseed oil, beeswax, and orange oil, leave a soft sheen that looks like bare wood. Avoid high-gloss polyurethane if you want a truly natural appearance.
Is oil or wax easier for a beginner to apply?
Wax is generally more forgiving for beginners. It stays where you put it, does not drip, and you can buff away excess easily. Oil can be messy and requires careful rag disposal. A wiping wax or balm like No. 524 lets you apply a small amount, let it absorb for a few minutes, and buff off the rest. Start with a test patch on a hidden area to build confidence.
How do you prepare wood before applying a natural finish?
Start by cleaning the surface with a damp cloth and letting it dry completely. Sand progressively from 120 to 220 grit, always sanding with the grain. Remove all dust with a tack cloth or vacuum. If the wood is bare, you can apply finish directly. If it has an existing film finish, test a small area first or follow the manufacturer's instructions. Proper prep ensures the finish absorbs evenly.
How do you maintain wood after applying a natural finish?
Dust regularly with a dry cloth and wipe up spills promptly. For oil and wax finishes, reapply a thin coat every few months or when the wood looks dry. Clean cutting boards with mild soap and water, then dry immediately and re-oil when needed. Avoid harsh cleaners. For food-contact surfaces, use a food-safe product like No. 524 and follow the label directions. Always test a hidden area before full application.


