

Simple Wood Care for Kitchen Cabinets: A Beginner's Guide
Table of Contents
- Start With the Finish: What Your Cabinets Can Handle
- How to Clean Wood Kitchen Cabinets Without Damage
- How to Clean Sticky Wood Cabinets and Grease Buildup
- What Not to Use on Wood Cabinets
- How to Polish Wood Kitchen Cabinets for an Even Sheen
- When a Wood Cabinet Conditioner Helps (and When It Won't)
- When Cleaning Is Not Enough: Refinishing Signs
- Frequently Asked Questions
Last Updated: October 21, 2026
Start With the Finish: What Your Cabinets Can Handle
Simple wood care for kitchen cabinets starts with one question: what is actually on the surface?
Most kitchen cabinets fall into two groups. Film-sealed cabinets have a clear top coat, like lacquer, varnish, or a factory finish.
You cannot always tell by looking. So test a hidden spot first, like the inside of a door or an area under a shelf.
When the finish is unknown, follow the cabinet maker's instructions. For antique or built-in cabinets, ask a pro before trying anything new.
How to Clean Wood Kitchen Cabinets Without Damage
The safest routine for how to clean wood kitchen cabinets uses two things: mild soap and warm water. Skip harsh sprays. Grease loosens with patience, not strength.
Here is a step-by-step routine:
- Dust the doors, frames, and hardware with a soft cloth first. Dry dusting lifts loose grit before it turns into muddy streaks.
- Mix a few drops of mild dish soap into a bowl of warm water. A common starting point is about a teaspoon of soap per quart of water, enough to feel slightly slippery, not enough to build suds. More soap means more residue to rinse.
- Dampen a microfiber cloth, then wring it out until it barely feels wet. Microfiber lifts grease into its fibers rather than pushing it around, and wringing is what keeps water out of door joints and frame seams.
- Wipe one section at a time, working top to bottom. Do a single door face, then move on. Working top to bottom keeps drips from running over areas you already cleaned.
- Rinse with a clean, damp cloth to lift soap residue. A second cloth kept separate from the soapy one is the simplest way to avoid redepositing film.
- Dry right away with a soft towel. Do not let water sit.
That last step matters most. Excess moisture is a common cause of swelling or finish damage around cabinet frames and door edges.
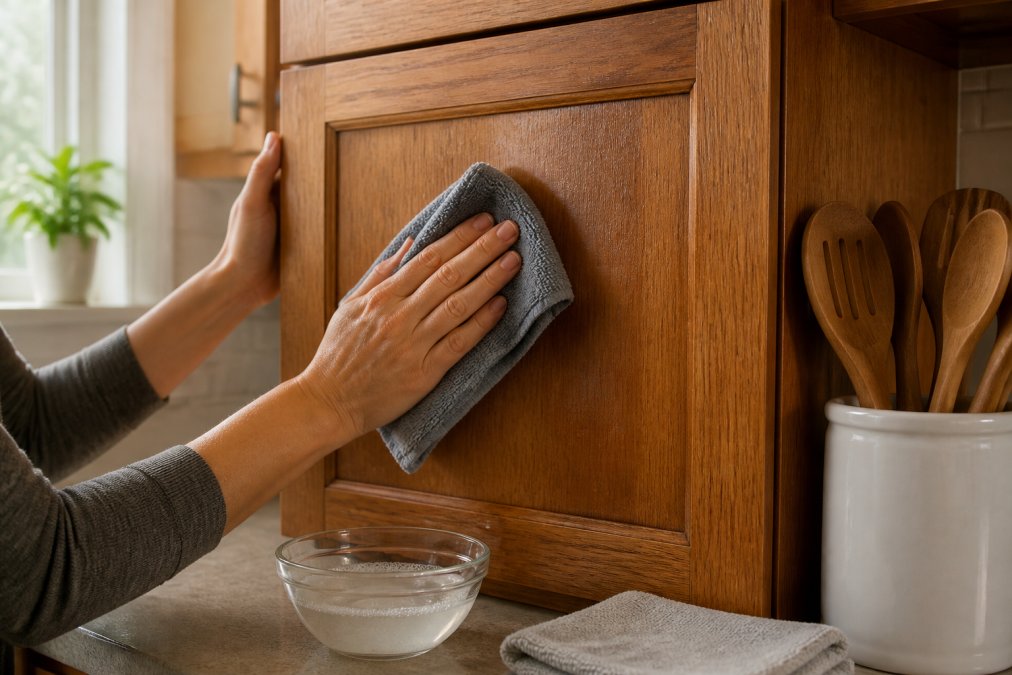
Close-up of hands wiping a wood kitchen cabinet door with a damp microfiber cloth, a bowl of mild soapy water nearby, warm natural light in a home kitchen
Why the Cloth and the Wringing Matter
The method is simple, but the details are where cabinets get damaged. A few practical notes:
- Use microfiber, not terrycloth or paper towels. Microfiber grabs grease and holds it; paper towels can leave lint and scratch a soft finish.
- Wring until barely damp. If you can see water glistening on the cloth, it is too wet for cabinet seams.
- Keep the soapy and rinse cloths separate. One cloth cleans, one cloth rinses. Mixing them just spreads soap film back onto the wood.
- Change the water when it looks cloudy. Dirty water leaves a dull haze that looks like finish wear but is really residue.
If a door still looks streaky after drying, the cause is usually too much soap or a rinse cloth that was too wet. Wipe again with a clean, barely damp cloth and dry immediately.
The Two-Cloth Method for Weekly Wipe-Downs
Weekly maintenance keeps grime from building up. Use one damp cloth to clean and one dry cloth to dry. That is the whole method.
Wipe the cabinet doors and frames where hands land most: around handles, edges, and the space below the counter. Skip the deep clean if the surface still looks even. Condition-based care beats a rigid calendar, wipe when the surface looks or feels grimy, not because a schedule says so.
How to Clean Sticky Wood Cabinets and Grease Buildup
Sticky film near the stove is normal in a working kitchen.
Warm, soapy water handles most food splashes and fingerprints. Let the damp cloth rest on a greasy spot for a moment, then wipe.
The reason patience works: grease softens as it warms and rehydrates.
For heavier grease on film-sealed cabinets, a degreaser made for that finish may help. Test it on a hidden area first, and follow the label.
Spot Treatment by Cabinet Zone
Different spots need different handling. This is where a generic routine falls short, the grime near the stove is not the same as the grime around a handle.
- Around handles: fingerprints and body oils. A damp cloth with mild soap lifts them. Wipe the handle itself too, metal and wood handles collect the same oils, and a clean handle keeps hands from transferring grime back to the door.
- Below the counter: food splashes and crumbs. Wipe the frame edge and the underside of the door, where splashes land and are easy to miss. Crumbs trapped at the seam can hold moisture, so dry this zone carefully.
- Beside the stove: grease and sticky residue. Warm soapy water, repeated. Hold the cloth against the film, then wipe. If the film is thick, work in small sections rather than soaking the whole door.
- Upper door tops: dust and cooking film. Dust first, then wipe with a barely damp cloth. Dust that gets wet turns into a sticky paste that is harder to remove than dry dust.
- Around the sink: water spots and soap film. A barely damp cloth and immediate drying handle most of it. Standing water is the bigger risk here than grease.
When a Degreaser Is the Right Call, and When It Is Not
A degreaser is not a routine product; it is a targeted tool for heavy buildup on a finish that can take it. Before reaching for one:
- Confirm the finish. Degreasers are formulated for film-sealed surfaces. On bare or oil-finished wood, they can remove the finish along with the grease.
- Test a hidden area first. Apply to the inside of a door or under a shelf and check the result before using it on visible faces.
- Follow the label. Dilution, dwell time, and rinsing instructions come from the manufacturer, not from a general rule.
- Rinse and dry thoroughly. Degreaser residue left on the surface can dull the finish or attract new grime.
If the grease does not lift after a couple of gentle passes with warm soapy water, the problem may be the finish rather than the grime, built-up cooking film on a dull or worn surface can look like grease but will not wipe away. In that case, stop and get advice rather than escalating to a stronger product.
What Not to Use on Wood Cabinets
Some cleaners do more harm than the mess they remove. Keep these away from wood cabinet doors and frames:
- Abrasive scrubbers and scouring pads
- Bleach or ammonia-based sprays on finished wood
- Vinegar as a routine wood cleaner
- Solvents, paint thinner, or heavy degreasers on unknown finishes
- Home-mixed chemical combinations
Do not treat vinegar as a sanitizer for wood, and do not mix cleaners. If you need to sanitize a food-contact surface, follow guidance from the USDA Food Safety and Inspection Service and the product label.
For any cleaner, check the EPA Safer Choice product guidance to confirm it suits the surface. When in doubt, plain mild soap and water win.
How to Polish Wood Kitchen Cabinets for an Even Sheen
Polishing is not cleaning. Clean first, then decide if the wood needs a conditioner.
A wood cabinet conditioner adds a soft sheen and helps restore warmth and depth to dry, dull wood. It does not clean, and it will not fix scratches or stains.
Apply a small amount with a soft cloth or a palm brush. Work it in, let it absorb for a few minutes, then buff away all excess.
When a Wood Cabinet Conditioner Helps (and When It Won't)
A wood cabinet conditioner helps when the wood looks dry, dull, or faded. It restores luster and adds a soft protective finish. It will not repair damage.
Here is the honest split:
- Conditioner helps: dry, chalky wood; dull sheen; light wear on oil-finished cabinets.
- Conditioner won't help: deep scratches, water rings, cracked or peeling finish, structural damage.
For those problems, cleaning and conditioning are not enough. That is refinishing work, and it belongs with a pro on valuable or antique cabinets.
A Simple Conditioning Routine With No. 524
Artisan Furniture Wood Balm No. 524 is a conditioner and protective finish, not a cleaner.

Artisan Furniture Wood Balm No. 524
How to use it:
- Start with a clean, completely dry surface.
- Test a hidden area first.
- Apply a small amount and let it absorb for a few minutes.
- Buff away all excess with a clean cloth.
For larger surfaces, the Premium Artisan Palm Wax Brush gives even, controlled passes. If you are new to wood care, the Starter Kit pairs the balm with the brush.


Reapply based on how the wood looks and how much the kitchen is used, not a fixed calendar.
Situation |
First Step |
Then |
|---|---|---|
Light dust and fingerprints |
Damp cloth wipe |
Dry right away |
Grease near the stove |
Warm soapy water |
Rinse and dry |
Dry, dull wood |
Clean and dry fully |
Condition with No. 524 |
Scratches or water rings |
Clean and dry |
Refinishing, not conditioning |
When Cleaning Is Not Enough: Refinishing Signs
Some cabinets need more than care. Watch for these signs:
- Finish peeling, cracking, or flaking
- Deep scratches or gouges in the wood
- Persistent stains, rings, or finish damage that do not improve with gentle cleaning
- Doors that stick or swell from moisture
If you see these, stop conditioning and get advice. For antique or veneered cabinets, speak with a professional before any sanding or stripping. The National Park Service preservation guidance is a good starting point for older pieces.
Least invasive first is always the rule. Start with the least invasive appropriate step, then consider refinishing only when the condition of the finish warrants it.
Frequently Asked Questions
What is the best thing to clean wood kitchen cabinets with?
For routine cleaning, a soft cloth or sponge dampened with warm water and a small amount of mild dish soap is usually enough. Wipe with the grain, then rinse with a clean damp cloth and dry promptly. For sticky or greasy areas, the same mild soap solution applied with a little more dwell time works better than harsh degreasers. Always test any cleaner on an inconspicuous area first, and follow your cabinet manufacturer's instructions if the finish type is unknown.
Can you use wood conditioner on sealed kitchen cabinets?
It depends on the finish. A wood cabinet conditioner is designed to penetrate bare or oil-finished wood to restore warmth and luster. Film-sealed surfaces like polyurethane or lacquer sit on top of the wood and block absorption, so a conditioner will mostly sit on the surface. Test a hidden area first and follow the cabinet manufacturer's guidance before applying any conditioner to a sealed finish.
How often should you condition wood kitchen cabinets?
Skip the calendar and watch the wood instead. Condition when cabinets start looking dry, dull, faded, or noticeably less conditioned. A busy kitchen may need attention sooner than a lightly used one, so base reapplication on appearance and use rather than a fixed calendar. Always follow the product's directions and reapply based on condition rather than a fixed schedule.
How can you tell when wood cabinets need refinishing?
Refinishing is the right call when the finish itself is failing: widespread peeling, cracking, or flaking, deep scratches through the finish, or gray, weathered bare wood. Cleaning and conditioning can restore warmth and depth to dry or dull wood, but they do not repair damaged finishes, stains, or structural issues. For antiques, veneer, or valuable pieces, get advice from a professional before any irreversible work.
Kitchen cabinets take a beating from steam, grease, and daily hands. A gentle routine keeps them looking cared for without risky shortcuts. Arlington Woodworks makes small-batch wood care simple, with Artisan Furniture Wood Balm No. 524 for conditioning dry, dull wood and kits that make the process easy to start. Get started with Arlington Woodworks and give your cabinets the care they have been missing.


