

How to Revive Antique Walnut Furniture: 7 Safe Steps
Table of Contents
- Start With the Finish, Not the Furniture: How to Identify Furniture Finish
- How to Clean Antique Wood Furniture Without Damaging the Surface
- The Best Oil for Walnut Furniture (and What Not to Put on It)
- Antique Furniture Restoration vs. Refinishing: How to Choose
- How to Revive Antique Walnut Furniture: A Step-by-Step Conditioning Routine
- Veneer, Joints, and Damage: When to Repair, Pause, or Call a Pro
- Protecting Revived Walnut: Sunlight, Humidity, and Everyday Care
- Frequently Asked Questions
Last Updated: October 12, 2026
Start With the Finish, Not the Furniture: How to Identify Furniture Finish
Most people reach for a product before they know what they're working with.
Furniture finish is the protective coating applied to wood, such as wax, oil, shellac, lacquer, or varnish. Each one reacts differently to cleaners, solvents, and new products.
Here's why this matters. The Smithsonian's guide to caring for furniture makes the same point: identify the surface before you treat it.
Test in a Hidden Spot Before Treating the Whole Piece
Test first, always. Pick a hidden area such as the underside of a tabletop, the back of a leg, or the inside of an apron.
Rather than using water, alcohol, solvents, or scraping to identify an unknown finish, test the actual care product you plan to use in that inconspicuous area.
Watch for unexpected changes in color, sheen, softness, stickiness, or surface texture. If the finish clouds, softens, lifts, or changes in a way you did not expect, stop.
If you still cannot identify the finish with confidence, treat it conservatively and follow the National Park Service's guidance on preserving historic finishes: use the least invasive approach first.
How to Clean Antique Wood Furniture Without Damaging the Surface
Start dry. Most antique walnut only needs dusting, not washing. A soft, lint-free cloth lifts everyday grit without touching the finish.
Dampen a cloth with distilled water for sticky spots. Wipe with the grain, then dry right away.
For greasy buildup, a few drops of mild soap in distilled water is enough. Wring the cloth until it's barely damp.
Dry Dusting, Mild Soap, and When to Stop
Stop the moment the cloth comes away clean. Over-wiping dulls a wax finish and pushes dirt into grain. If the surface still looks dull after a gentle clean, stop before scrubbing harder. The issue may be wear, dryness, an aging finish, or something else that cleaning will not correct.
The Best Oil for Walnut Furniture (and What Not to Put on It)
The right conditioner for walnut furniture should be compatible with the existing finish, apply cleanly, and leave the surface looking conditioned rather than greasy. Oil-and-wax blends are one common option for compatible furniture surfaces.
What to avoid:
- Cooking oils that are not formulated for wood care
- Heavy product buildup from repeated applications
- Silicone-heavy polishes when future repair or refinishing may matter
- Any product that is not compatible with the existing finish
For a food-safe option on kitchen wood, we make Artisan Furniture Wood Balm No. 524. It's a small-batch balm made with certified organic flaxseed oil, beeswax, and orange oil. It conditions and protects, and it's safe for cutting boards and butcher blocks when used as directed.

Artisan Furniture Wood Balm No. 524
Antique Furniture Restoration vs. Refinishing: How to Choose
Antique furniture restoration preserves the original finish; refinishing strips it back to bare wood and starts over. With antique walnut, preservation is often the safest starting point, but the decision should come from what you observe.
1. Read the finish condition
Look at the surface under raking light (a lamp held low and to the side). Sort the piece into one of four states:
- Intact but dry: The film is continuous, color is even, and the surface just looks thirsty or chalky. Condition it.
- Intact with surface marks: Scratches, white rings, or dull patches sit in or on the film, but the film itself is unbroken. Clean gently, then condition. Do not sand.
- Failing film: You see cracking, flaking, alligatoring, or areas where the finish has worn through to bare wood in high-touch spots. This is where preservation and refinishing genuinely compete.
A fingernail dragged lightly across the surface tells you a lot. If it catches on lifted edges, the film is failing. If it glides, the film is sound.
2. Check for veneer before you commit
Many walnut antiques, especially case goods, drawer fronts, and tabletops from the 19th century onward, are veneered, not solid. A thin walnut skin over a secondary wood is normal and historically correct, but veneer changes the rules:
- Sanding through a veneer is permanent. There is no fix short of re-veneering.
- Stripping can loosen veneer at the edges, especially if glue has already failed.
- Heat and moisture, including steam, can lift veneer that was previously tight.
To check, look at the edge of a tabletop or case piece: a thin layer of walnut over a different-colored wood means veneer. On legs, solid walnut shows continuous grain through the thickness; veneered surfaces show a seam or different substrate at the edge. If the piece is veneered, lean hard toward preservation. If it's solid walnut with a failing finish, refinishing becomes a more reasonable conversation.
3. Weigh historical value and patina
Patina is the accumulated color, wear, and surface character only time produces. It cannot be recreated. On genuine antiques, original finish and patina carry a meaningful share of the piece's value and identity, and once stripped, they are gone.
Ask:
- Is this a period piece, or a later reproduction?
- Is the finish likely original, or has it already been refinished once?
- Does the piece have family, historical, or market significance?
If the answer to any of those is "yes" or "I'm not sure," treat the finish as something to preserve. The National Park Service's guidance on preserving historic finishes is a useful starting point for the preservation-first mindset.
4. Match the intervention to the problem
What you observe |
Least invasive move |
Why |
|---|---|---|
Dust, fingerprints, light grime |
Dry dust, then a barely damp cloth |
Dirt is on the surface, not in the wood |
Dull, dry, chalky but intact film |
Clean, then condition with a wood balm |
The finish appears sound; gentle conditioning may improve appearance |
Light scratches in the film |
Preserve; touch up locally if needed |
Damage is shallow and reversible |
White rings or cloudy patches |
Start with gentle cleaning; stop if the cause is unclear |
Often moisture trapped in the film, not ruin |
Cracked, flaking, or alligatored film |
Pause; get advice before stripping |
Stripping may be the only fix, but it's irreversible |
Worn-through areas on a veneered piece |
Preserve; consult a conservator |
Veneer limits what you can safely remove |
Loose veneer, wobbly joints, cracks |
Stop; structural repair first |
Cosmetic work on an unstable piece wastes effort |
The rule that governs all of it
Choose the least invasive step that addresses the actual problem, and stop when it's solved. You can always do more later; you cannot un-strip a finish, un-sand a veneer, or put patina back. If the piece is dry or dull, structurally sound, and the existing finish is compatible with conditioning, a least-invasive care step may be more appropriate than refinishing. That's the case for most antique walnut in a modern home.
How to Revive Antique Walnut Furniture: A Step-by-Step Conditioning Routine
This is the safe routine for dry, dull walnut with an intact finish. It takes about 30 minutes for a small piece. You'll need a soft lint-free cloth, a clean dry cloth for buffing, and a wood balm.
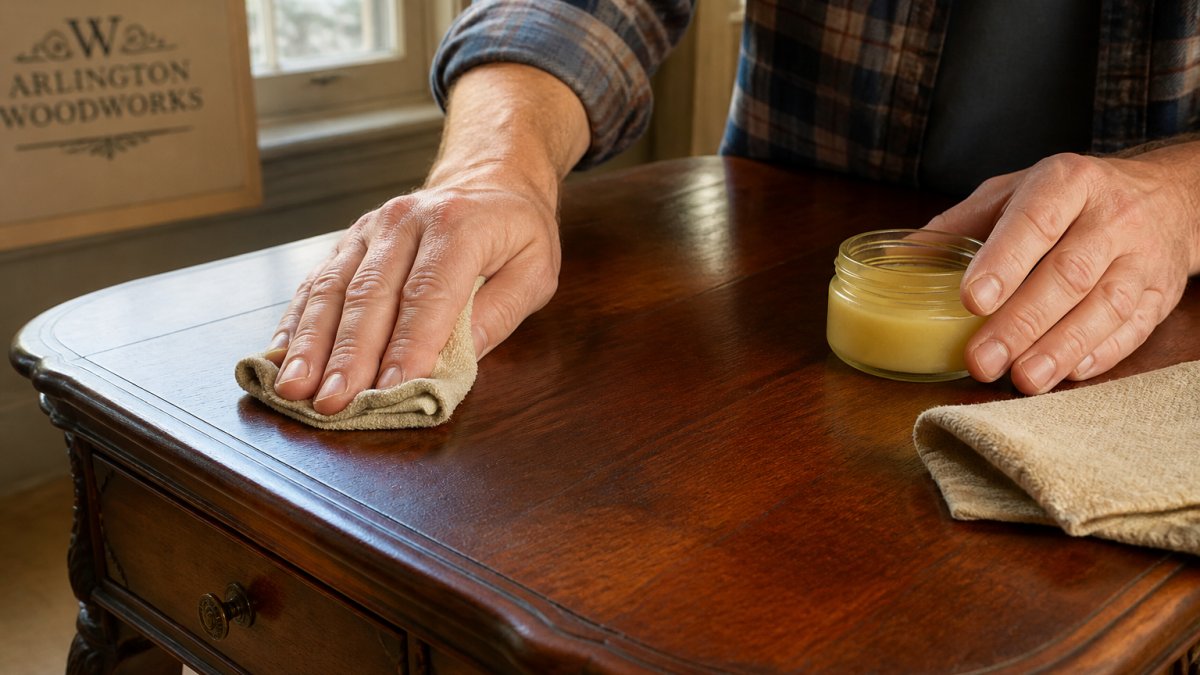
Close-up of hands applying a small amount of wood balm with a soft cloth to the surface of an antique walnut side table in a warm, naturally lit room, with a jar of balm and a second clean cloth nearby
- Clean first. Dust and wipe the surface, then let it dry completely.
- Test a hidden spot. Try the balm on the underside or back before the top.
- Apply a small amount. Scoop a little balm onto a cloth.
- Work it in. Rub in circular motions, then follow the grain.
- Let it absorb. Give it a few minutes to soak in.
- Buff away all excess. Use a clean dry cloth until the surface feels dry, not tacky.
- Repeat only if needed. Thin coats beat thick ones.
Applying a Wood Balm and Buffing for an Even Sheen
Buffing is the step people rush, and it decides the result. Work in small sections, turning the cloth to a clean side. The goal is a soft, even sheen, not a wet look.
For larger surfaces like tabletops, a brush gives you more control. Our Premium Artisan Palm Wax Brush has an ergonomic grip and dense natural bristles for smooth, even passes. If you're new to this, the Starter Kit pairs the balm and brush together.


Veneer, Joints, and Damage: When to Repair, Pause, or Call a Pro
Know your limits. Some problems belong to a conservator, not a Saturday afternoon. Here's how to tell the difference, and why each is a stop sign.
Loose or lifting veneer
Veneer is a thin sheet of walnut glued to a secondary wood.
What you'll see:
- A hollow sound when you tap the surface lightly
- Edges that lift when you press gently
- Bubbles or ripples that catch raking light
Why it's a stop sign: Repairing veneer means injecting adhesive under the lifted area and clamping it flat without starving the joint or staining the face.
What you can safely do: Keep the piece out of direct sun and away from vents to slow further lifting.
Wobbly or loose joints
A wobbly leg or racking chair is a structural problem that gets worse with use. The traditional repair is fresh hide glue worked into the joint and clamped.
Why it's a stop sign: Hardware-store epoxy and polyurethane glue are permanent. They cannot be reversed without damaging the wood, and they can crack the surrounding wood if the joint moves again.
What you can safely do: Stop using the piece until it's repaired.
Deep scratches, gouges, and dents
These problems go beyond simple surface conditioning. A scratch that cuts through the finish into the wood will not disappear with balm, and a gouge that removes wood cannot be filled by oil or wax.
What you can safely do:
- Shallow scratches in the film only: Leave them, or touch up locally with a matching product. They are part of the piece's history.
- Dents in the wood (not the finish): Sometimes a dent can be raised with moisture and heat, but the technique is easy to overdo and can damage surrounding finish. On an antique, get advice first.
- Gouges and missing wood: This is a conservator's job. Filling and coloring to match aged walnut is a skill, and a poor match is more visible than the original damage.
Our balm helps restore warmth, depth, and luster to dry or dull wood. It does not repair scratches, gouges, cracks, or structural damage.
Water rings, stains, and cloudy patches
Water rings and white haze can result from moisture affecting the finish rather than the wood itself. Some improve with time and gentle care; others require finish-specific treatment.
Dark stains that have penetrated the wood are a different problem. They are in the wood, not on it, and conditioning will not lift them.
Cracks and splits
A crack is a repair job, not a polish job. Walnut moves with humidity, and an open crack usually responds to a moisture change.
What you can safely do: Stabilize the environment. Keep the piece in steady indoor humidity, away from radiators, vents, and direct sun. Then get advice on whether the crack needs a structural repair or can be left as-is.
When to call a pro
Call a conservator or experienced restorer when the piece is veneered and the veneer is lifting; joints are loose or the piece racks when moved; you see cracks, splits, or missing wood; the piece may be valuable, period, or historically significant; or you are unsure whether the finish is original. If you're unsure whether a piece is valuable, ask an appraiser before you touch it, a short consultation is almost always cheaper than an irreversible mistake.
Protecting Revived Walnut: Sunlight, Humidity, and Everyday Care
Once revived, keep it that way. Walnut fades in direct sun and cracks in dry air. Place pieces away from vents, radiators, and windows that bake in the afternoon, and aim for steady indoor conditions, a humidifier helps in dry months.
Everyday habits that help:
- Dust weekly with a soft cloth
- Use coasters and felt pads
- Condition when the surface begins to look dry, dull, or noticeably less conditioned
Reapply balm based on the condition of the surface rather than a rigid calendar. Store the jar somewhere cool and out of direct light.
Frequently Asked Questions
Can you revive antique walnut furniture without stripping its original finish?
Often, yes. If the finish is intact but dry or dull, cleaning with a soft cloth and distilled water, then applying a thin coat of a food-safe wood conditioner such as Artisan Furniture Wood Balm No. 524, can restore warmth and depth. No. 524 is made with certified-organic flaxseed oil, beeswax, and orange oil and is a conditioner and protective finish, not a cleaner or repair product. Stripping should be considered only when the condition of the finish truly warrants it, especially on older or potentially valuable pieces.
What is the best oil for walnut furniture?
Hard-wax oils and food-safe balms made with plant oils and waxes are a common choice for walnut because they add depth without leaving a heavy film. Artisan Furniture Wood Balm No. 524 is made with organic flaxseed oil, beeswax, and orange oil and is intended for furniture, antiques, cabinets, and cutting boards when used as directed. Start with a clean, completely dry surface, apply a small amount, let it absorb a few minutes, and buff away all excess. Test a hidden area first.
How do you clean antique walnut furniture without damaging it?
Begin with dry dusting using a lint-free cloth, working with the grain. For sticky residue, wring out a cloth in distilled water with a drop of mild soap, wipe sparingly, and dry immediately. Avoid soaking the wood and never pour liquid directly onto the surface. If the existing finish is unknown, follow the surface manufacturer's instructions before trying anything new, and test any method on a hidden area such as the underside of a leg or apron.
Is it worth it to restore antique furniture instead of refinishing it?
Preservation-focused restoration can help retain original finish, patina, and historical character. Cleaning, conditioning, and light touch-ups keep the original patina, wood grain, and finish history that collectors look for. Refinishing removes the top layer and can reduce value on older walnut pieces, so reserve it for furniture where the finish has truly failed. If the piece is structurally sound, a gentle conditioning routine with a product like No. 524 is often the least invasive first step.
Antique walnut rewards patience more than products. The trick is diagnosing the finish, cleaning gently, and conditioning only what's actually dry. That's the whole approach behind what we make at Arlington Woodworks: simple, food-safe care that respects the wood instead of fighting it. Our balm, brush, and kits are built for exactly this kind of careful, everyday work. Shop all products and give your walnut the gentle revival it deserves.


